Published on 29 January 2021
Posted in
Parquet flooring is a design that uses interlocking pieces of wood to create patterns that give a decorative effect. The most common style of parquet flooring is the “herringbone” pattern.
Because it can be made of real wood (modern techniques allow parquet flooring to be made from engineered wood) parquet flooring can be refurbished and dyed instead of needing to be ripped up and replaced when redecorating. This post will take you through the process of refurbishing the floor to bring it back to a new standard.
The first step is to ensure the flooring is clean and in good condition. Make sure there are no gaps between the panels and that none have risen. If they have been repaired then grout them before cleaning as any products you use (glue, filler, etc.) will be able to be cleaned off before sanding. A specific cleaner for parquet flooring should be used as it will dissolve the layers of wax on the wood. While this isn’t essential if there’s any wax left it will clog up your sander and generally make your life more difficult.
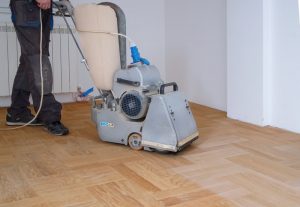
Once the floor is cleaned it’s ready to be sanded. Consider hiring an orbital floor sander for this, and be prepared to do hard to reach areas such as the corners of the room by hand. You should sand the floor in several stages, starting with 36 grit paper. This will remove the filler and cut it down straight to the wood. The next pass should be with 60 grit paper to remove the rest of the finish. At this point, you may wish to use 80 grit paper to remove any evidence of scratch marks from the wood. If however, it is in good condition then you can skip to 100 grit paper which acts as a finishing stage before applying wood stain.
Once the floor is prepared you should choose a stain in a colour you like. The stain will seal and protect the wood from damage. It is very easy to apply, only requiring a cloth to rub it into the surface. It should be left for a few minutes before you wipe the excess off with a second cloth. Always allow the stain to dry overnight before walking on it.
Once the stain has been allowed to properly dry you should apply a finish. Oil or water-based finishes are available and come down to your preference; do you want a shinier finish or a more matte look?
Once you’ve chosen, consider buying or renting a floor finish applicator as it’ll allow you to evenly spread the finish without leaving the marks that a paintbrush would leave. To create the best finish you should consider using three layers of finish, lightly sanding the layers with grit between applications. Do not sand the final layer as the finish will be compromised.
Contact us
If you would like to find out more about how we can help you, get in touch today on 0208 427 6604 or head over to our contact page for more details.
2025 ©Floor Sander Hire London. All Rights Reserved. Company No: 04545051
Web Design and Marketing by Loop Digital